Living unhappily and self-consciously with a smile you aren’t proud of can be a challenge for anyone
Here at Synergy Dental Clinics, we have dedicated our lives to help people that struggle with this every day.
We try our best to bring the perfect solutions to the table for each one of our patients. We strive to assess each patient’s medical, dental, financial, and social circumstances. We use these to determine the best options for them.
One of Dr Bagasi’s recent patients, who will remain anonymous for this case study, was another patient we’ve helped through the difficulties of missing teeth and a damaged sense of self. He was unfortunately afflicted by missing teeth on his lower arch and was struggling to find the right dentist to help him. He met with Dr Bagasi for his first consultation. During this consultation, he underwent a quick assessment of his overall oral health. Then Dr Bagasi took a look at his lower arch to determine what he could do to help
There were two main options Dr Bagasi could provide for the patient. He could have had a full denture or an implant-retained denture or bridge. Of course, the denture was a viable and cost-effective solution for the patient, but he was very much insistent from the start to have a new permanent fixture. Dr Bagasi and the patient came to the solution of having an implant-retained bridge. As a result, he was incredibly excited to begin treatment.
Step one – starting implant treatment
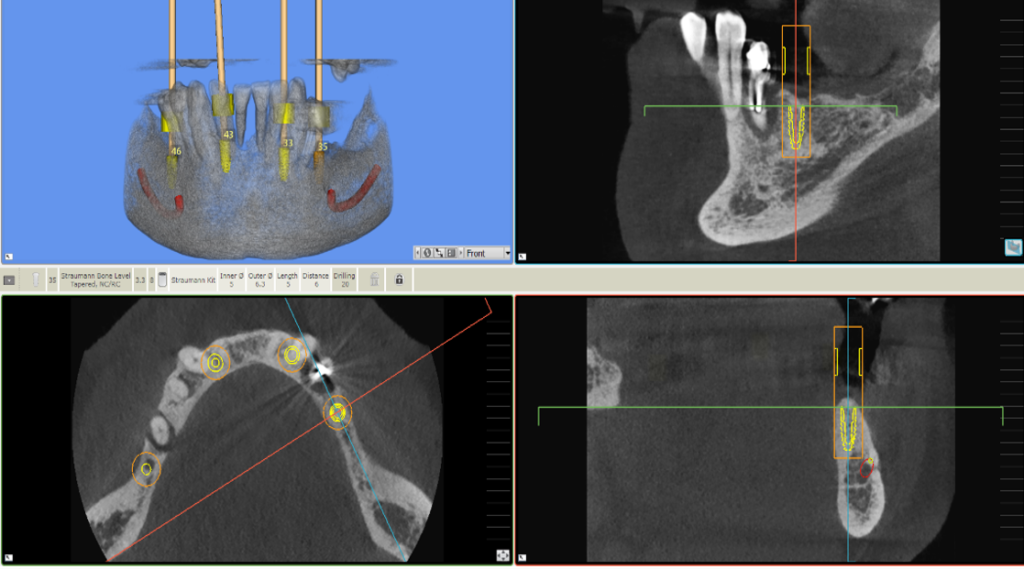
As with any other dental treatment that requires minor oral surgery, some initial tasks must first be carried out to ensure the safety of the patient. These tasks also give the treatment the best chance of succeeding. For this treatment, a CT-scan was taken for multiple reasons. These reasons include assessing the bone levels, checking if bone grafting is required, and creating a surgical guide. The surgical guide is particularly important, as it significantly reduces the invasive nature of the surgery. This can only be achieved with a CT scan. Although, an x-ray can also suffice for less intricate treatments.
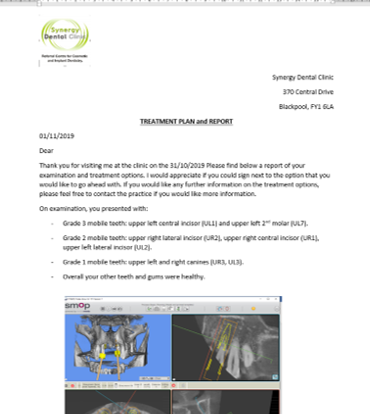
After this, a final report must be drafted up for the patient. Here, they can see what the treatment will do, how the dentist will do it, the risks, the benefits, along with all the cost implications. The patient will need to sign and consent to all this before the surgery appointment is booked and finalised. For this patient, he was happy with the report and happy to continue further with the treatment.
Step two – the surgery
The treatment is likely the most straightforward step of the entire process. As Dr Bagasi is so experienced in placing implants, there was very little risk of anything going wrong. For the patient, there were some nerves before the surgery began, but Dr Bagasi was able to keep him very calm throughout.
The surgery appointment can be booked up for either the full morning or full afternoon, but it rarely takes this long in reality. The extended time allowed the patient to feel comfortable. This gives time for the operating dentist to prepare. It also gives the patients some time with the dentist after the surgery has finished. Like most implant appointments, the surgery took roughly two hours per implant, and Dr Bagasi was able to provide the patient with important aftercare advice to put his mind at ease.
Step three – healing, reviews, and bridgework
This is the single most important step that must be followed strictly. Doing so will reduce the risk of the implant failing to heal, and makes sure the implant is stable over a long period. It’s also the step where you’ll be able to talk with your dentist the most about any worries or concerns – so communication is key here.
You’ll be expected to attend multiple review appointments over the next few months following your surgery.
This is what is called your ‘healing period’. This patient followed the healing period very well. This meant that Dr Bagasi was regularly able to check the implants for any signs they weren’t healing correctly. The first review was two weeks after the initial placement. This is for a very basic assessment and common oral care advice. His next review was another six weeks after that.
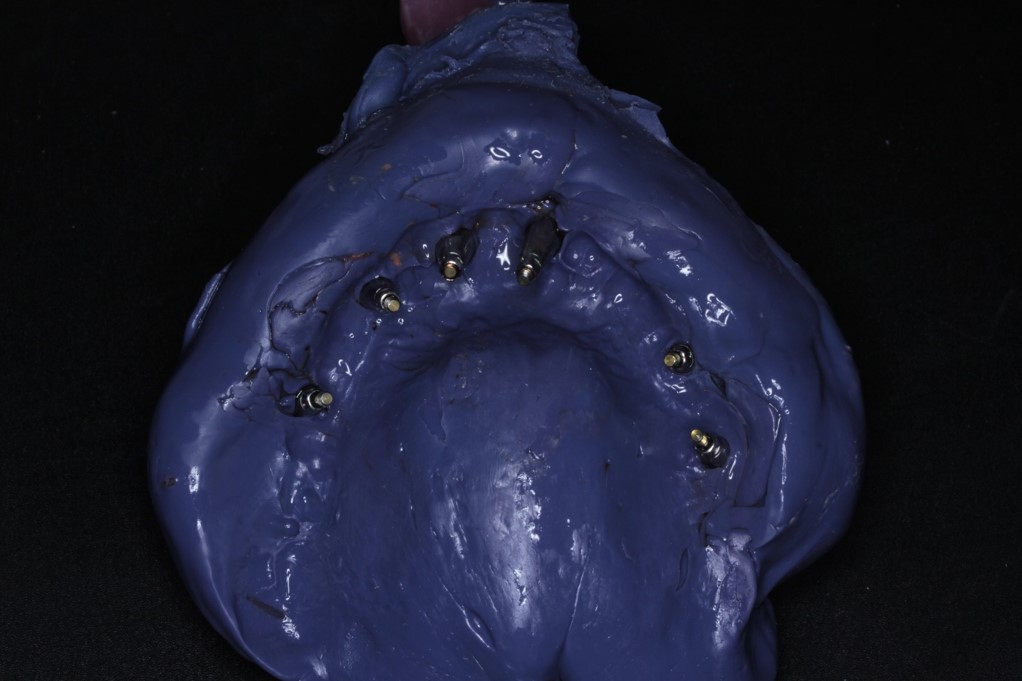
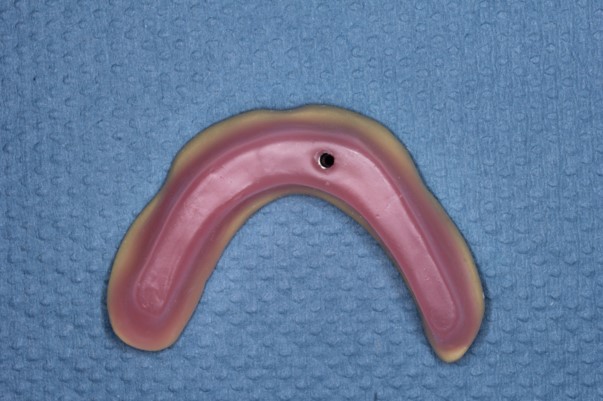
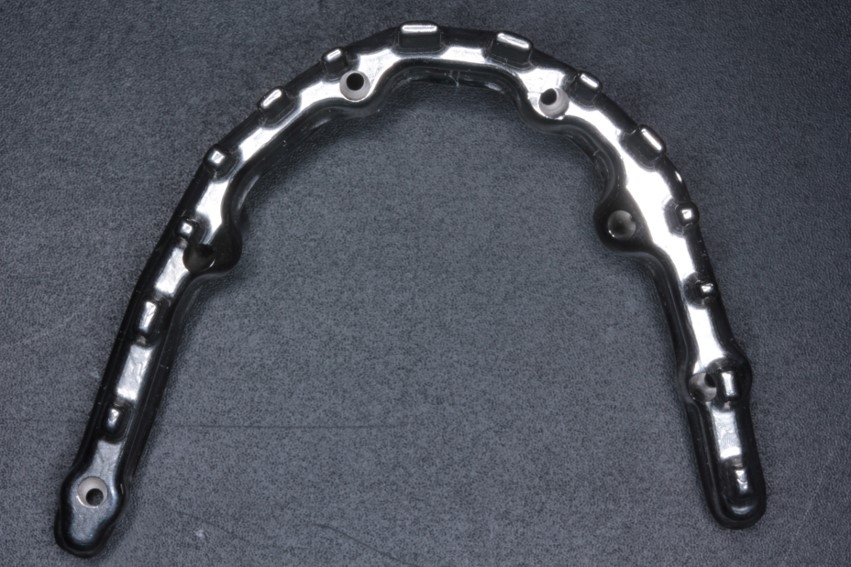
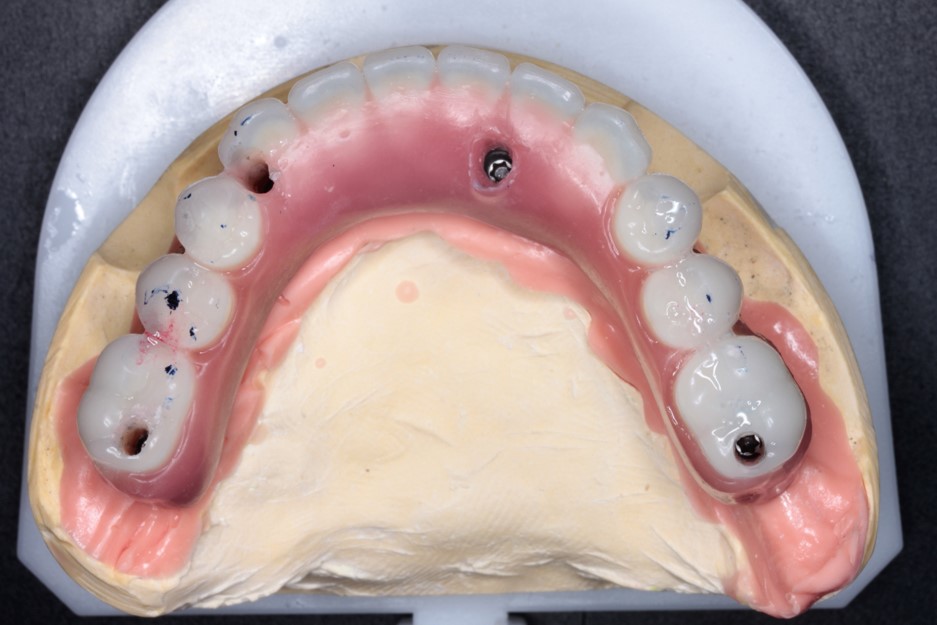
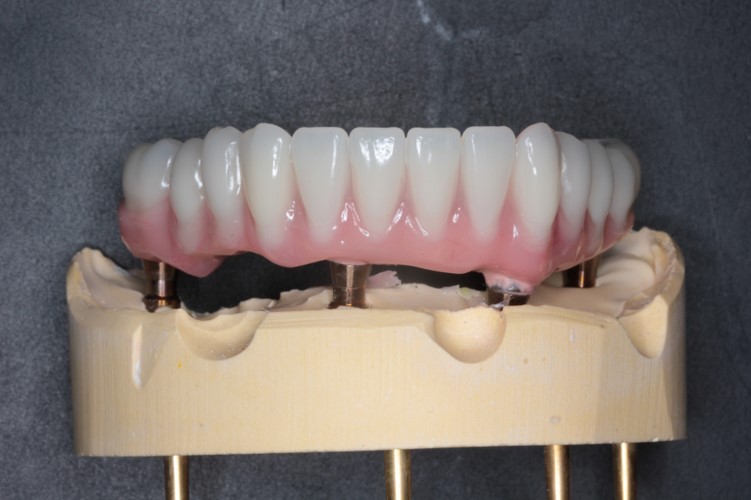
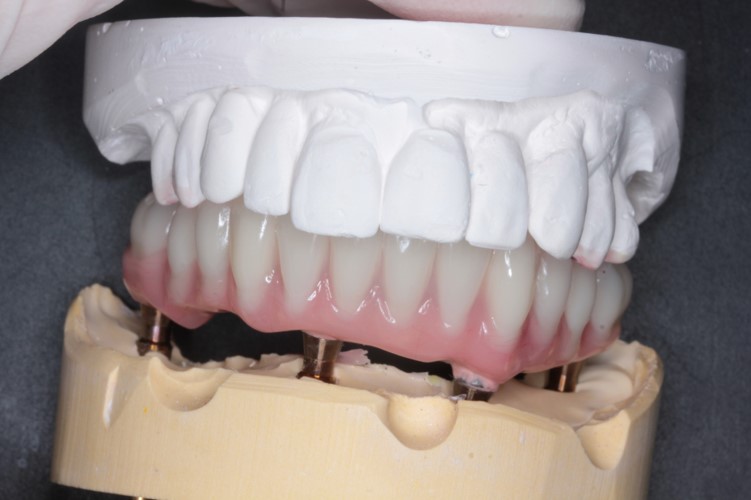
Another four weeks after that, impressions for your final bridgework can now start. This will allow the laboratory to prepare your new teeth. This preparation will coincide with the end of your designated healing period. Once those impressions were taken, they were then sent to the laboratory for beginning his bridgework. A week later, the patient was called back. During this appointment, a second set of his impressions were taken with a special tray. Then, a final week after this is where bite registration, multi-unit abutment (MUA) fitting, and Duralay jig fitting were all completed.

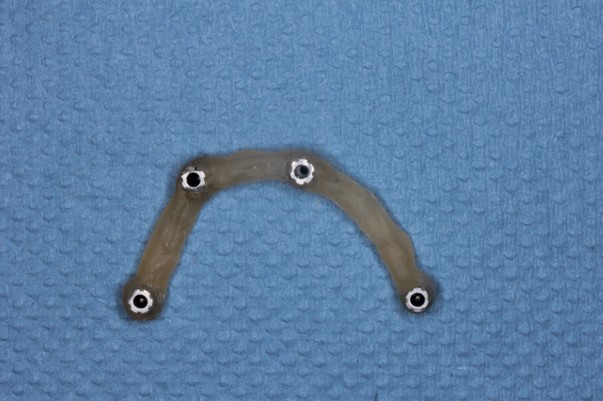
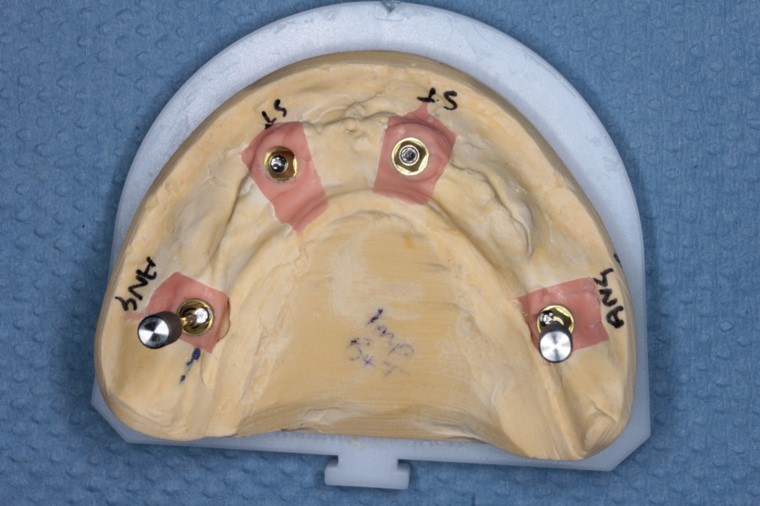
Over the next few weeks after this, his mock-up bridgework was trialled to make sure he was comfortable and they fit well. This process can take a few weeks of tweaking and perfecting. Nonetheless, the final results were just around the corner for this patient…
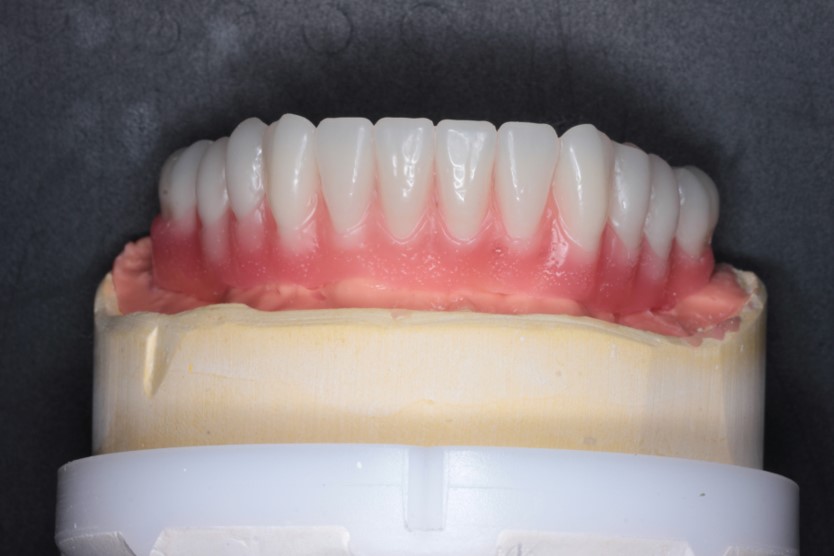
The last step before the final fitting is the try-stage. During this stage, the bridgework is presented to the patient so that they can see what the final results will look like. It also allows patients to bring up any final concerns or queries. Furthermore, it gives the dentist the opportunity to make very final last-minute adjustments. These adjustments ensure they are perfect on the final-fit day!
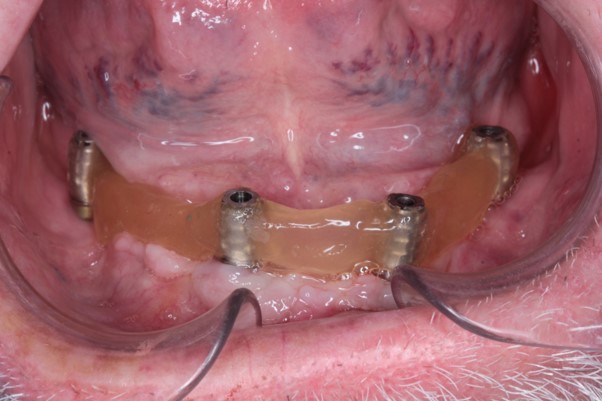
Step four – the final fit
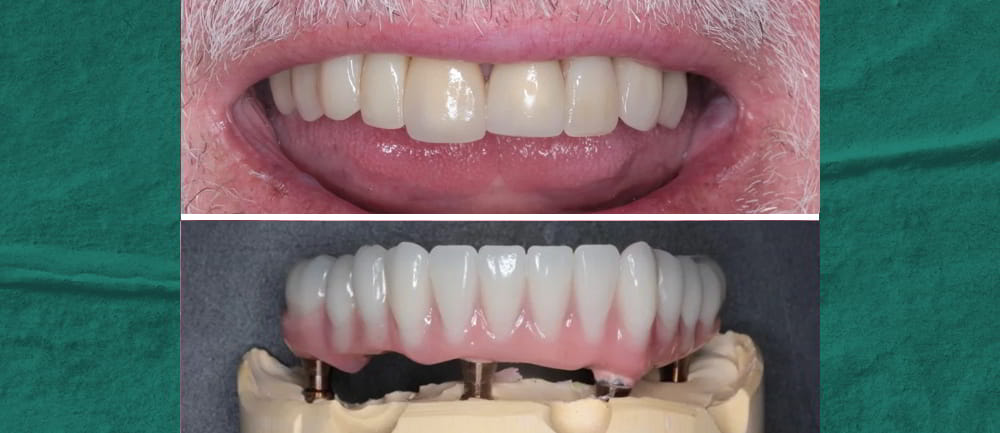
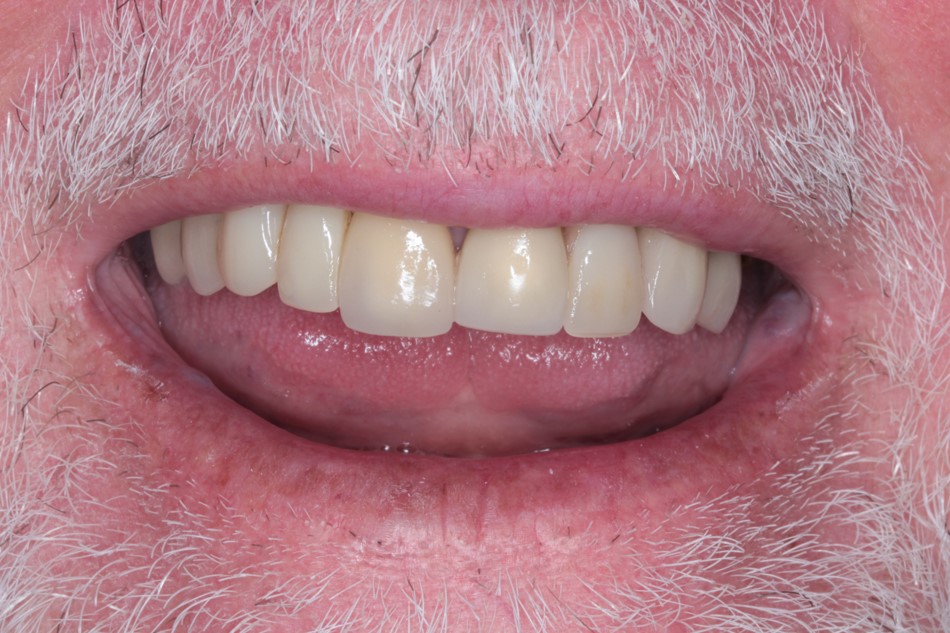
The final fit is the step many patients are holding on for. While it can take some time and effort to get to this step, it doesn’t lessen the impact of seeing your new smile in all its glory. The patient could not wait for the final reveal and he was taken aback with the outstanding work Dr Bagasi had accomplished for him. These moments are what our dentists live for – to see just how much your smile can impact your happiness.
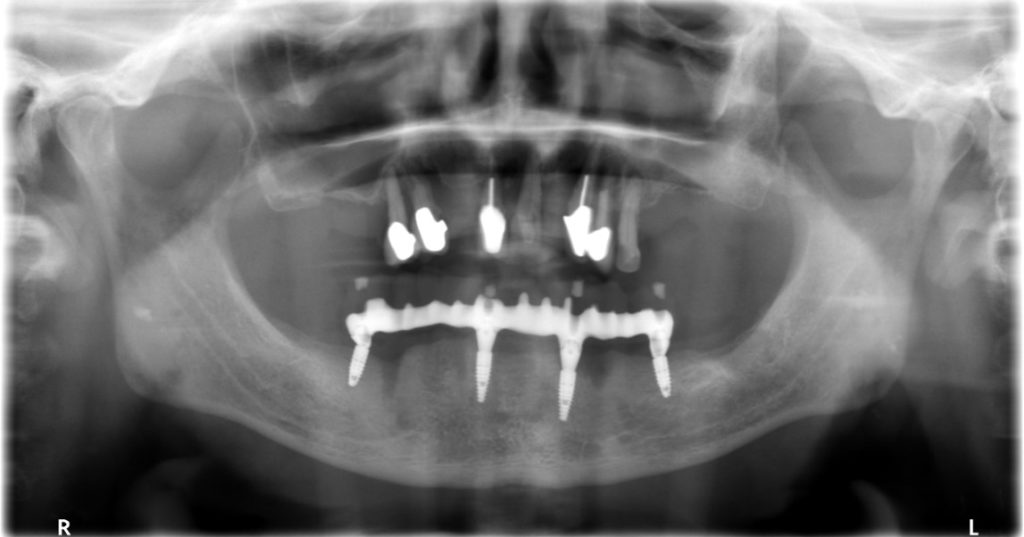
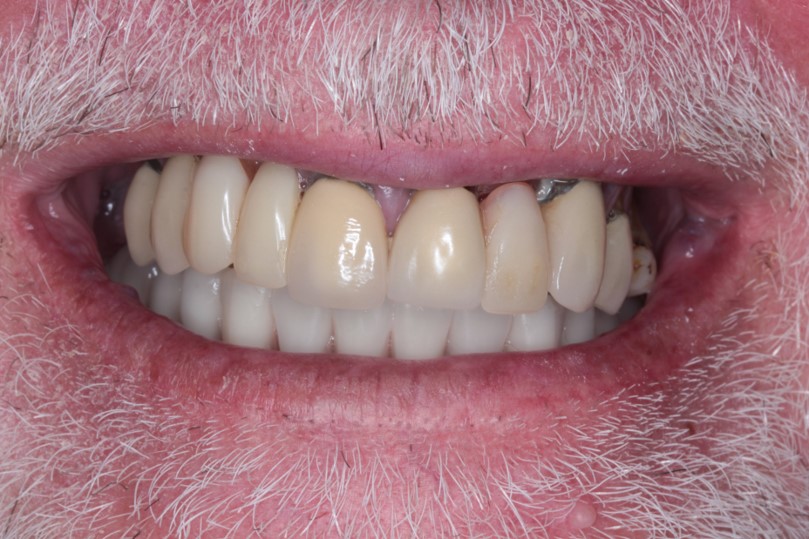
Along with final photos, the patient had his final x-rays taken to make sure there were as perfect inside as they were outside.
Unsure about your dental health? Call your nearest Synergy Dental Clinic and we’ll be happy to help.