Take a look at how Dr Bilal Salim has improved one of his patient’s lives with a simple composite bonding treatment.
Who doesn’t want to feel confident every now and again? Cosmetic dentistry is there to help improve the smiles of patients and make them feel more confident in themselves. Fixing those tiny insecurities can have the biggest, most profound results. A recent composite bonding case taken on by Dr Bilal Salim, one of Synergy Dental’s associate dentists, demonstrates this excellently.
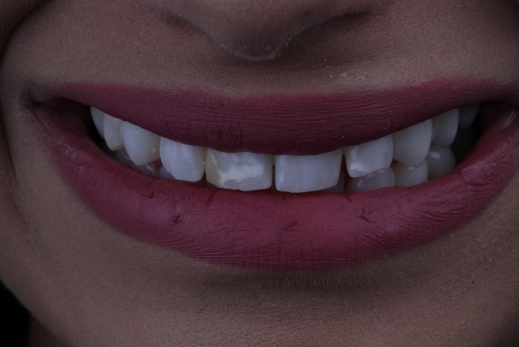
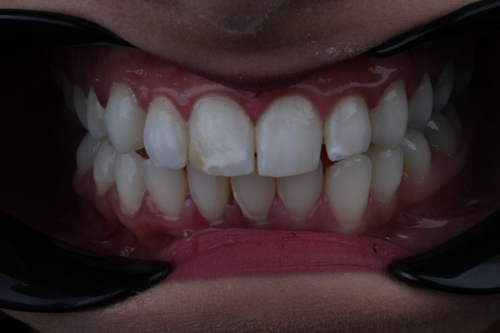
The patient, Sanah, directly messaged Dr Bilal Salim through his Instagram page to arrange a consultation. The patient was travelling from Dewsbury – a 40-mile trip to Synergy Dental Bolton. Sanah was presenting white spots on her front teeth, which also included uneven teeth. These issues had always been a concern for her. After taking the time to research composite bonding and looking through example cases on Dr Salim’s Instagram page, she finally decided to make a change!
The way many dental treatments begin, including Sanah’s, is with an initial consultation. Beginning with routine examinations and x-rays, Dr Salim could confirm Sanah was healthy enough to proceed with the treatment. We then took digital photographs, a digital scan, and went over Sanah’s main concerns. We then went through available treatment options, timings, costs, and the kinds of procedures involved. She was very eager to proceed and was set on having composite treatment on her front three teeth. This provided a symmetrical and even smile.
Stage One – assessment, photography & digital scan
It is important to first ensure the patient has healthy teeth and gums. It is paramount before any cosmetic work. A routine examination was carried out on Sanah, followed by x-rays and advice for looking after the teeth and gums. Dr Salim also explained the importance of a healthy diet for good oral hygiene, which is another factor patients can overlook.
Sanah eventually had her photographs taken which is a very important stage of the process. The photographs allow dentists to communicate options with their patients, help them plan the cases themselves, but also for before and after pictures. Patients are usually very excited about these.
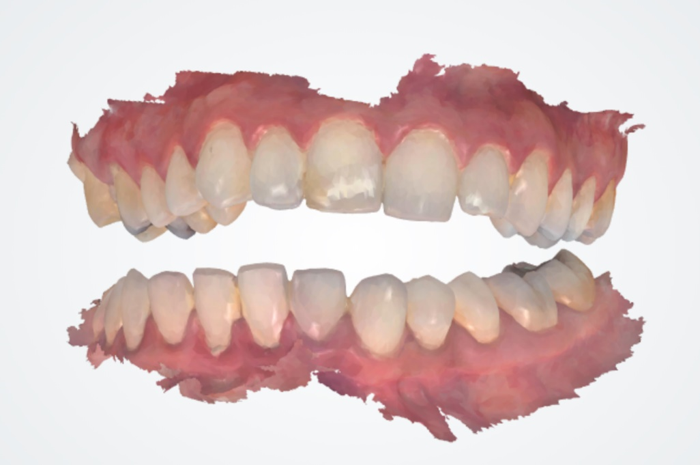
We now use digital scanners at Synergy Dental. So, for Sanah’s treatment, we took a digital scan. We used these over conventional impressions because of their more accurate, colourised 3D scans of the teeth. This, once again, helps the dentist to communicate with the patient about different options and for planning the treatment going ahead. We then use this digital scan to formulate a fully fleshed-out wax-up.
At Synergy Dental, we have now transitioned to more advanced digital dentistry practices. Conventional impressions can be incredibly messy and uncomfortable for some patients. By switching to digital scanners, the accuracy of a wax-up is far better. This also means quicker, more predictable outcomes. For this patient, we used a scan so we could visualise the teeth in 3D and also send to the laboratory. They constructed a wax-up to help with the placement of the composite bonding, allowing the patient to see the end results before going ahead.
Stage Two – the composite bonding wax-up
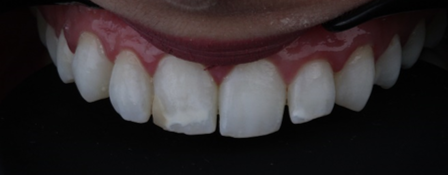
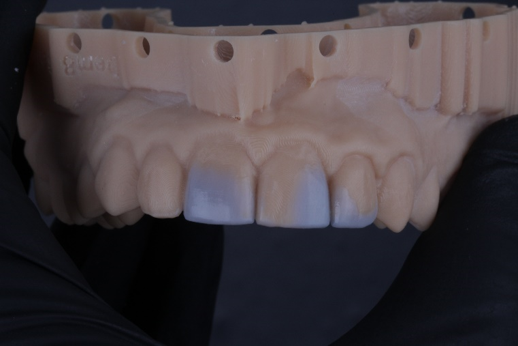
The scan and the photos are sent to the laboratory where the technicians will construct a fully personalised wax-up. The scan is 3D printed and the wax is added to the model in a bespoke fashion, which will ensure teeth are made to the satisfaction of the patient. It also ensures the results will be predictable and will avoid any unwanted surprises for the patient. Of course, with resin-based bonding treatments, we can always make final adjustments and tweaks at the end, if the patient requires it.
The blue wax shows where the composite is to be added, to improve the shape, size, and symmetry of the teeth. This is then used by the dentist to help with the placement of the composite.
Stage Three – placement and final steps
Often, patients will want to whiten their teeth before their composite bonding treatment. This generally produces a much better result and a much more aesthetically appealing smile. Sanah had already carried out whitening treatment previously, so she was happy with her current tooth colour.
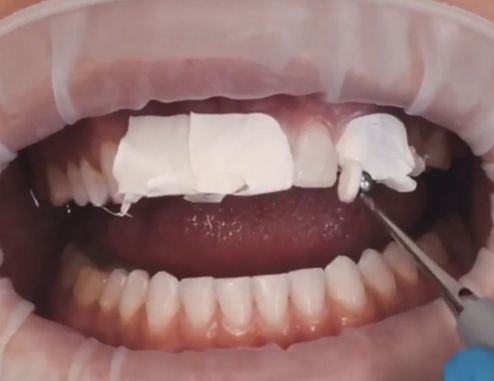
We arranged a two-hour appointment for the placement of the composite. In this appointment, there are no injections or drilling required. We use a plastic frame or a rubber sheet to keep the cheeks and tongue out of the way. This keeps things as dry as possible.
Each tooth is then done individually. We use dental tape to help isolate each tooth as and when they’re being worked on. It also blocks out the rest of the teeth. A gel and an adhesive are applied onto the tooth, which will prepare the tooth for the composite to stick to. The composite is then sculpted onto the tooth using special instruments, brushes, and tools designed for resin bonding treatment.
Once all the teeth are done, we spend some time polishing them to ensure the composite has a bright shine and natural finish. We can also make some adjustments here if the patient isn’t completely satisfied.
Once the treatment has been completed, it’s time for the final reveal! Sanah was particularly ecstatic with her final composite bonding results and felt she could now smile with much more confidence.
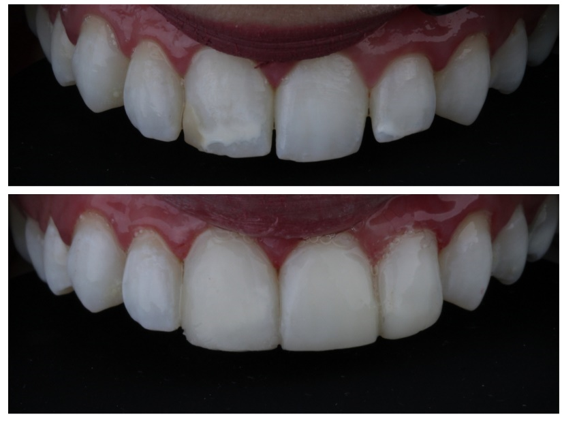
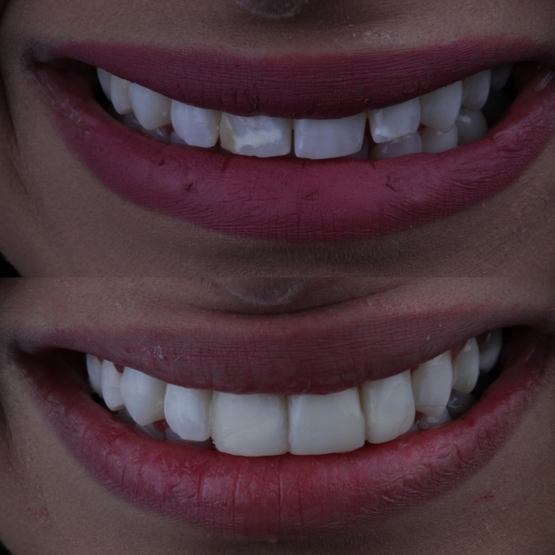
We give some general advice about how to avoid staining and hard foods for the first week after treatment. We also advise regular check-ups and hygiene visits to ensure we keep an eye on the health of the teeth and the composite treatment. Take a look at the incredible smile Sanah gets to wear with pride every day. She loves the results!
Unsure about your dental health? Call your nearest Synergy Dental Clinic and we’ll be happy to help.